Ableton Meld – Darkest Drone
5 May 2024
Taper 66 – Tape Emulation Effect
10 August 2024Hi, Welcome back!
That cool effect I did in the tutorial (https://youtu.be/TWQULiIpQDY) is just a way to show you what else can you achieve with the envelope follower. The effect at the end doesn’t have to be redux, but anything really. Could be Reverb, saturation, chorus, some wobbly pitch effects, really the sky (and your imagination) is the limit here.
I think I have explained everything clear in the tutorial, but let’s have a look on some settings:
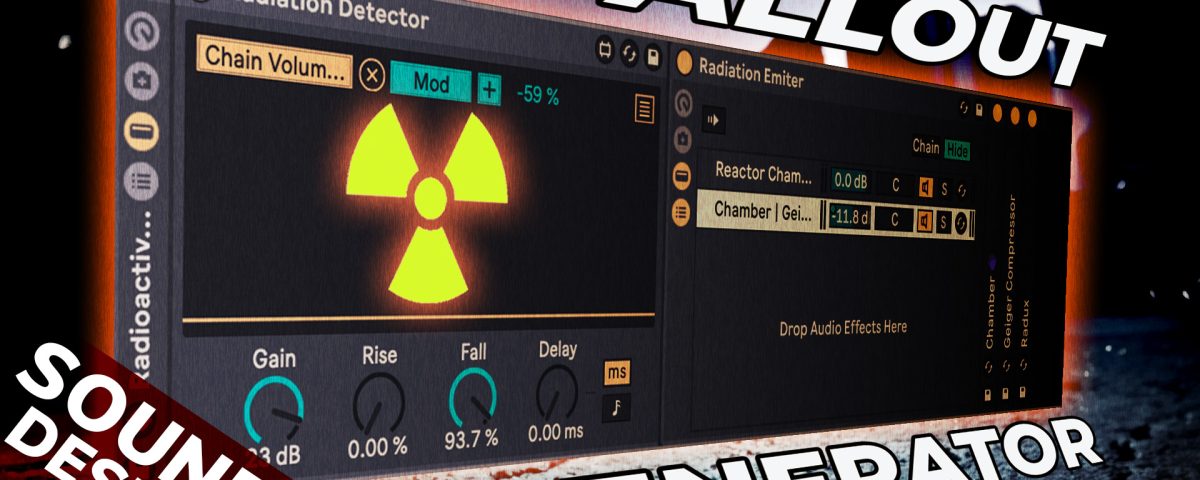
Envelope follower

So this is the key of the whole effect basically. Envelope follower listens to the incoming audio signal and then creates, well an envelope that can be used to control other things within the track. It can control many different parameters in fact if you open the 4 line menu button in the top-right corner. Then you just simply tweak the 4 knobs to achieve the shape you want, and decide how much will the envelope affect the controlled parameter. In this case I’ve checked that -50% to -65% works the best (that also depends on how loud is the Redux chain set up). I did some trials before recording this video and I simply didn’t want to mess up the settings, that’s why I sticked to -59% and -11.2dB on the chain. Of course these values can be slightly different.

But what would happen if the Mod value was +59? The whole redux signal would be getting louder if the input signal was getting louder, so it would add the two chains together. When it is within the negative values it ducks down the sound when the input sound is present and only releases accordingly to the knobs (fall and delay).
2. Audio Effect Rack

This tool is the best. You can literally route anything and however you like. In this case we’re creating 2 chains “Uncontaminated” with only a convolution reverb, and “Reverb | Comp…” which hides the whole other effects together. Now the envelope follower decides how much of the second chain we will hear.
3. All effects 100% wet

This isn’t of course needed but the whole chain doesn’t need to pass any of the source signal as we have the “Uncontaminated” one that does that. In this chain though we can have only the sound with the effect, and of course it can be any other effect you want.
In this case I went for Redux, added Reverb to make the input signal more spread out and longer, then made it even louder with the compressor. What is important in the Reverb is to filter low frequencies as we don’t want a buildup of the low rumbling reverberated sounds. Compressor simply cuts some sounds that are too loud but adds much more make up gain to the whole processed sound. So the processed sound lasts longer and allows us to hear it after the envelope follower does it’s fade.
4. Alternative option – Compressor + Side chain

If you don’t have the envelope follower or don’t want to use it, you can use the compressor with side chain (ideally at the end of the chain as it is the easiest to set up. Simply crank up the Ratio to infinity : 1 which means that whatever gets above the threshold line will be flattened and won’t be any louder than the threshold line.
But what’s most annoying if you’d like to save the preset and reuse it in the future. You would have to set up the “Audio From” each time. It will have to listen to the source signal just after the instrument so you need to set it to the same track you’re working on and make sure it is “Pre FX”. Also you may need to adjust the gain if needed.
Ok I hope that helps a bit 😀
Here’s the link to the Effect i have made during the tutorial:
Radioactive-Fallout-Alpha.adg_.zip
If you want to rewatch the video, it’s here: https://youtu.be/TWQULiIpQDY
And if this tutorial helps you in anyway, feel free to buy me a virtual coffee ☕️. I’d really appreciate this.
Thanks ❤️


